


Changing hair- and eyecolor live on stream with OBS plugins
First published: November 2, 2022
Last updated: December 25, 2023
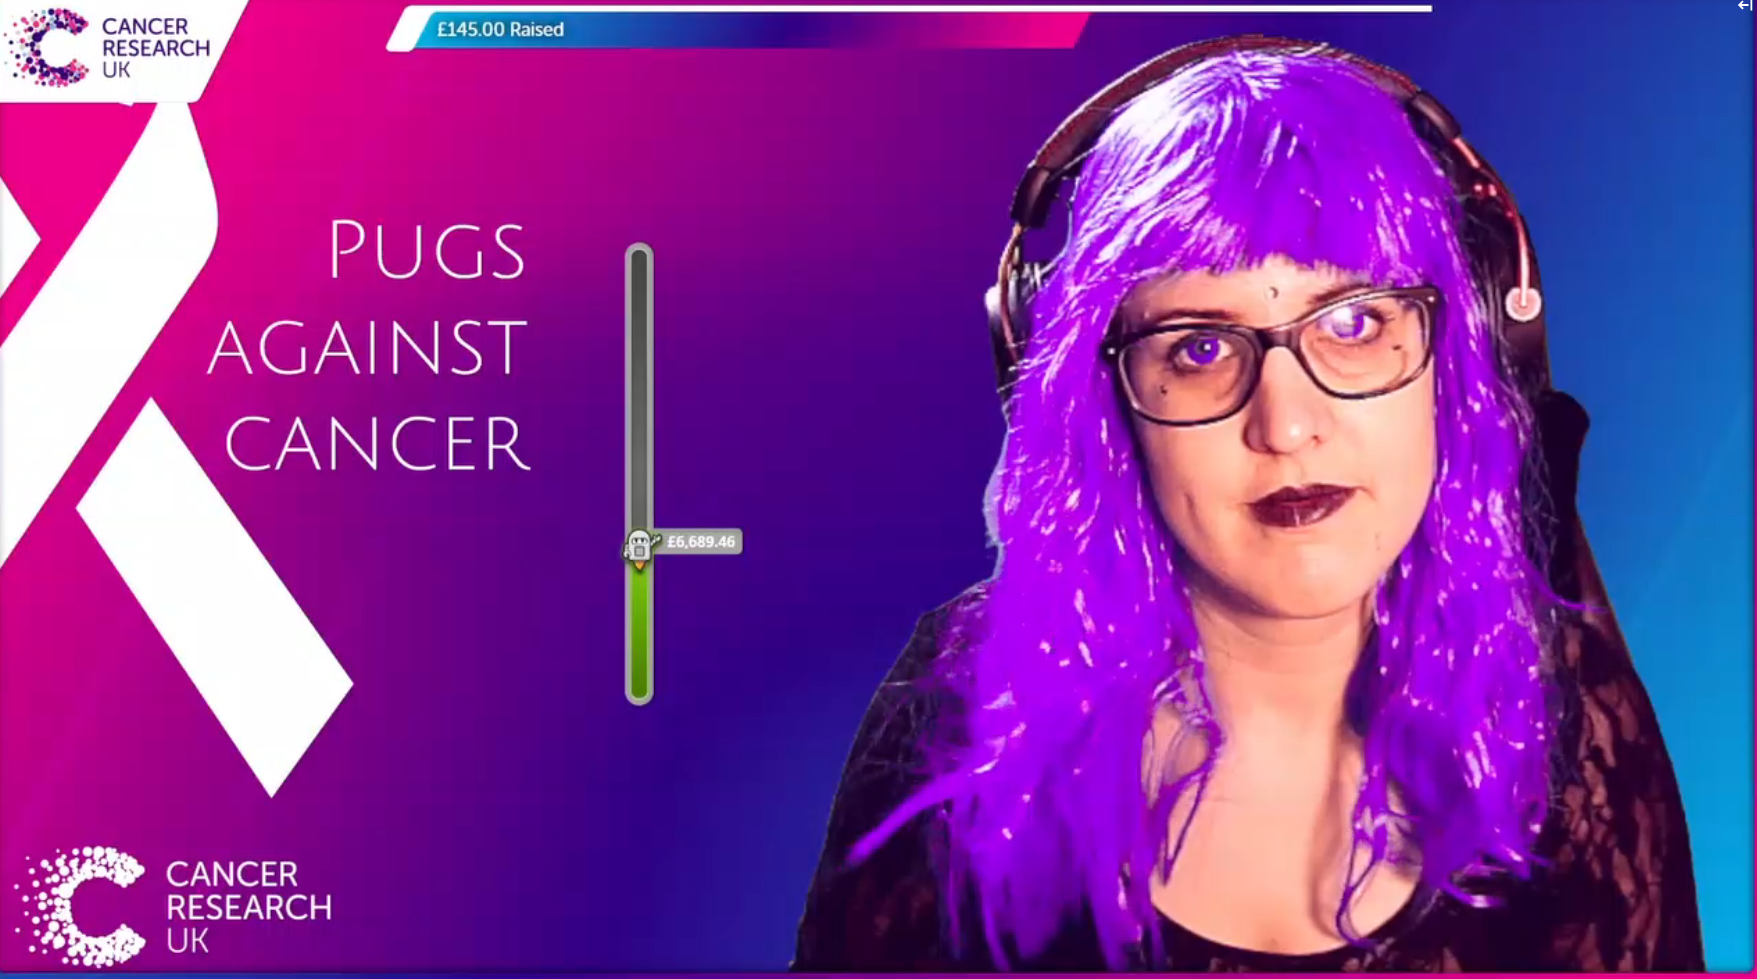
At the end of October, I participated in a fundraising event on Twitch. As an incentive to donate, I gave the donators the option to change my hair- and eyecolor. To change the color, I either pressed one button on my Streamdeck (for previously saved colors) or adjusted a hue effect ins OBS.
This is how smoothly and fast it worked:
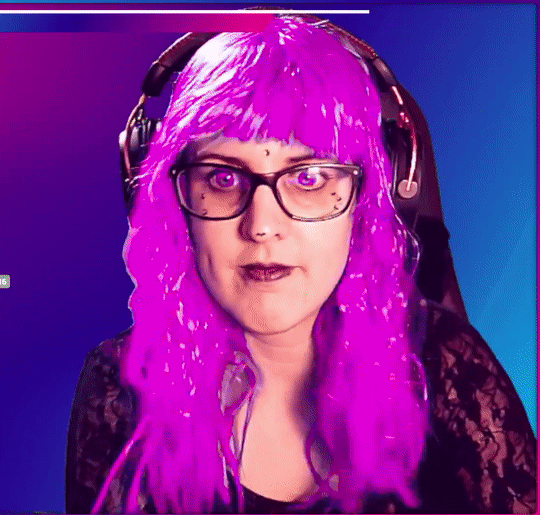
It required some fiddling and fine adjusting, but worked pretty well in the end. The hair did not look realistic and some colors worked better with the bluescreen effect than others, but overall I was very happy with the effect.
Required hardware
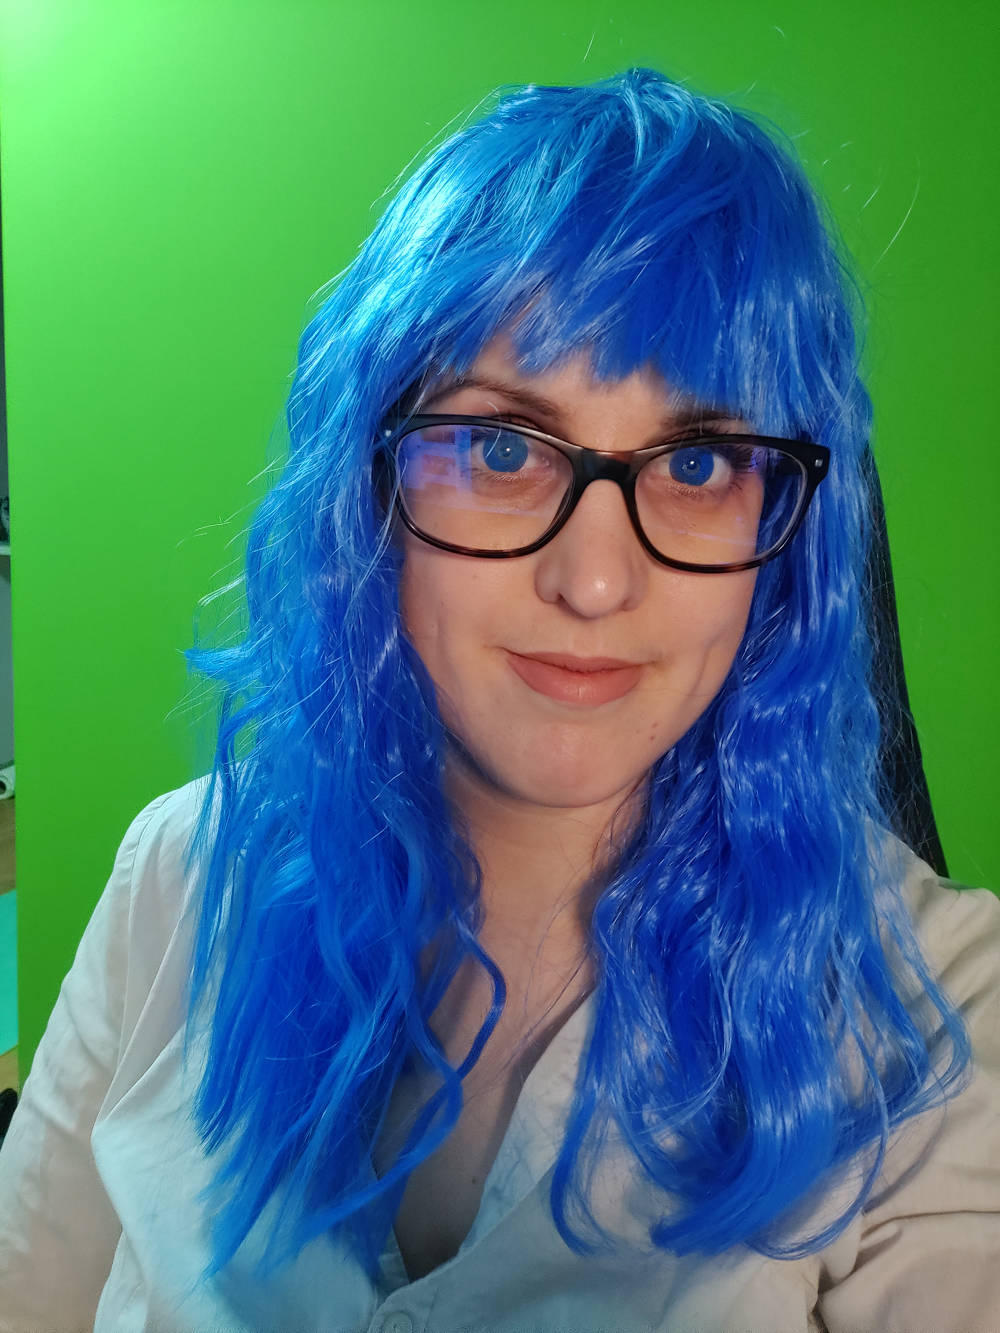
- Wig and/or contact lenses in either a strong blue (if you use a greenscreen like me) or strong green color. The stronger the color, the easier it is for OBS to color key the respective color. More expensive, natural looking wigs will probably make the color look more realistic as well, just be aware that a lot of color differences and shades in the wig and lenses will make it more difficult to properly key it later.
My wig was super cheap from a costume shop, the lenses I ordered from TTDEYE. They have a lot of variations and also offer colored subscription lenses (I only bought simple ones). - (Streamdeck) <- optional
Required software
- OBS (as you need to install plugins)
- OBS plugin: StreamFX
- OBS plugin: Move Transition (when in combination with Streamdeck)
Multiple camera sources for custom hair and eye colors
The challenging part of the setup is that you want multiple layers with your camera source:
- The top layer will be your camera with hair/eyes keyed out.
- The middle layer will be your camera just with color changes.
- The original cam source.

With vanilla OBS (no plugins) you usually cannot use multiple copies of the camera source with different filters applied. That's why we need the plugin StreamFX which gives us the option to use a mirror as source.
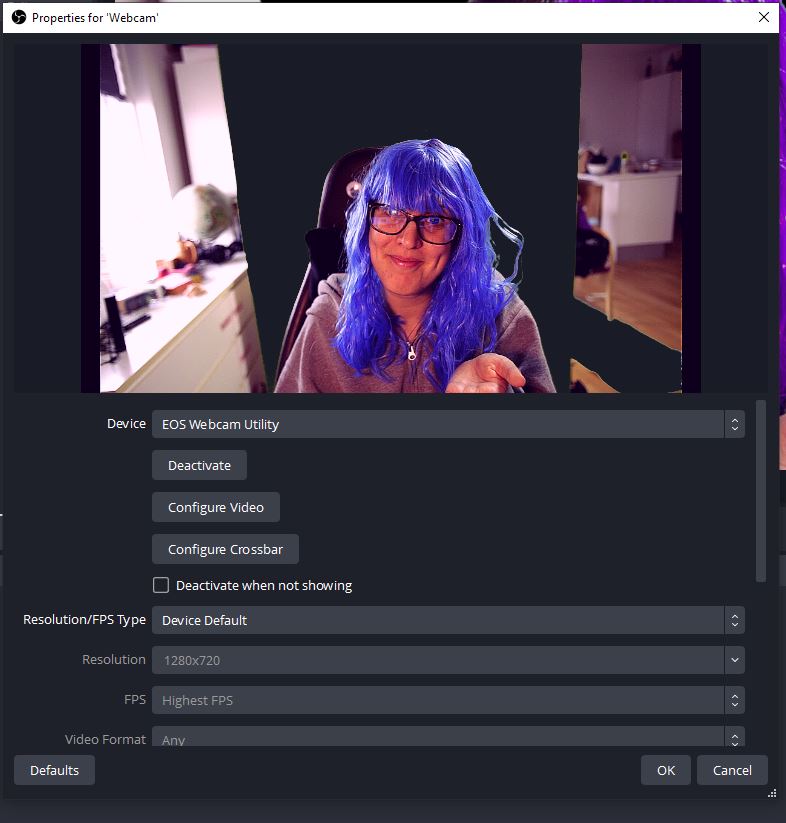
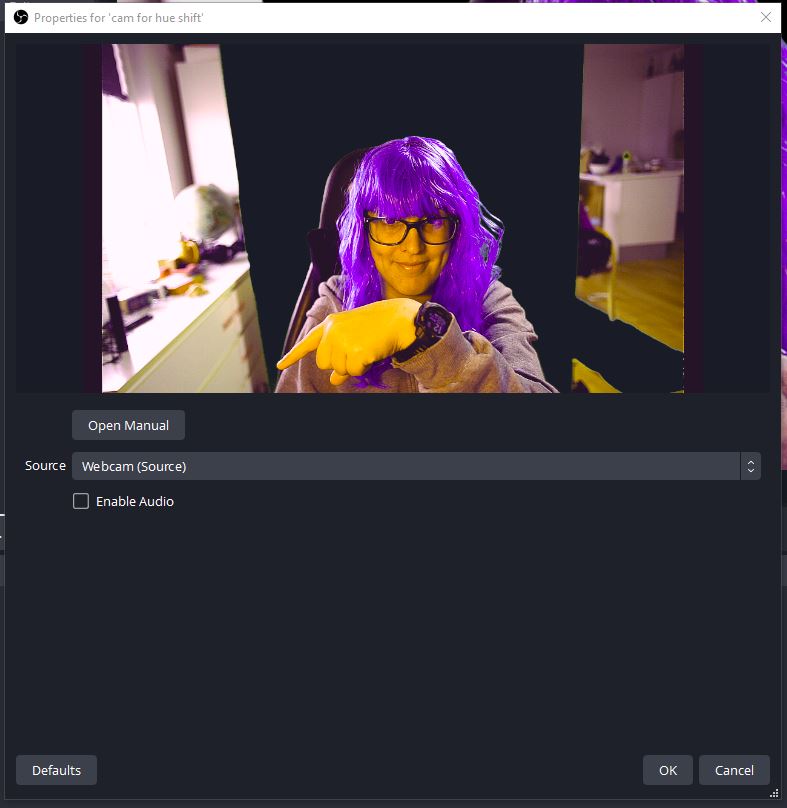
- Add your webcam of choice as a regular source. This is how it looks for me:
- Now add two new sources, but pick "Source Mirror" from the menu. For both, choose your original webcam source.
To the source in the middle - called "cam for hue shift" in my screenshot - I added a color correction filter and changed the hue until my hair and eyes had a color I liked (ignore the rest, only hair and eyes are important):
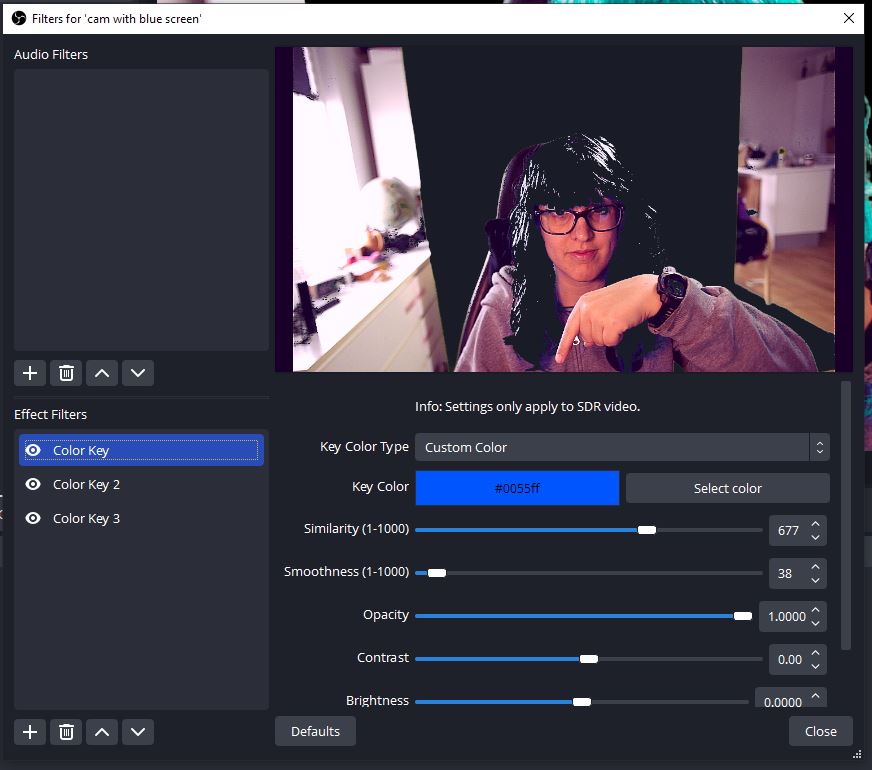
To the source in the middle - called "cam with blue screen" in my screenshot - I added a color key filter and changed the settings until my hair and eyes were keyed out:
In the overall scene, you should now look like your hair and eye color has changed! Feel free to experiment with the settings of the two filters to make it look as good as possible.
Changing the color on the press of a button
You can change the color by going into the filter settings and adjusting the various sliders. However, I expected to change the colors quite often and to not always have to alt+tab out of a game and open the deeper settings of OBS, I wanted to save some colors so I could just press a button on my Steamdeck.
For this to be possible, we need to use the plugin Move Transition. It is mostly known for giving the option to move sources around as part of a transition, however, it also provides the functionality to adjust filter values without actually having to go into the filter settings - just what we need!
The plugin is a bit difficult to understand and I need to get into the groove of it every time I use it every couple of months. Here is what I usually get wrong (until I realize and have to redo everything):
Adding the the filter "Move value" to a source will only control the transition between the original and new filter values - it is still the original filter, that will be applied!
- Your middle source - in my screenshot "cam for hue shift" - should currently have one filter applied for the color effect.
- Add the filter "Move value" to the same source. Give it a telling name, like the color it will change to.
- Under "Filter:", pick the filter, that had already been applied to the source (Color Correction). For "Movie Value Type:" pick Settings.
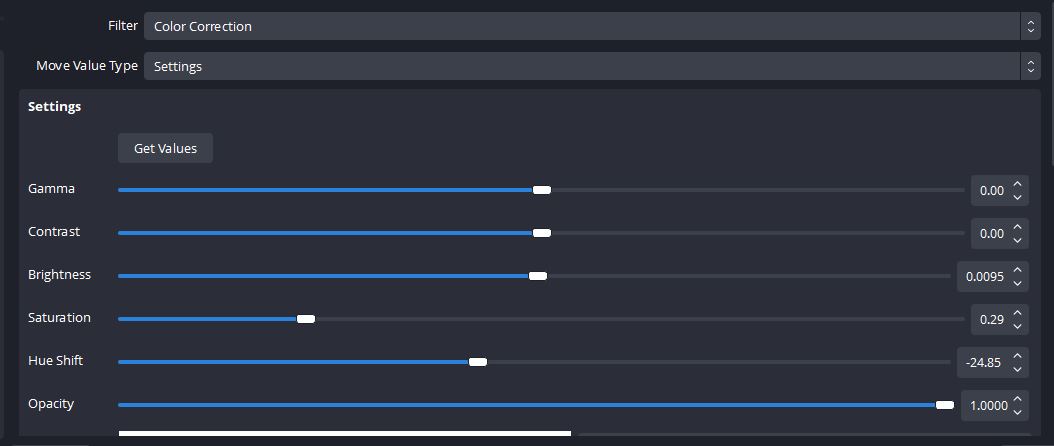
- Set the new values for the color correction filter that you would like to have applied after you press the button. In my case, I mainly only changed the hue slider.
- The next settings are all regarding the transition of the effect change. I would like the transition to the new color to happen
- When I press a button, that will toggle the visibility of the filter
- I don't want to manually stop the transition, it's supposed to do it by itself as soon as the values have reached their end destination, so to say.
- The transition should be like a smooth morph, not a hard cut.
My transition settings looked like this:

The filter uses the word "move" which can be confusing if you don't actually want to change position of an element but just change the setting of an effect. It helps to think of it as "the slider of the hue setting moving".
I added a lot of "Move Value" filters to my source as I wanted to be ready with a variety of possible colors. My filter list for "cam for hue shift" looked like this in the end:
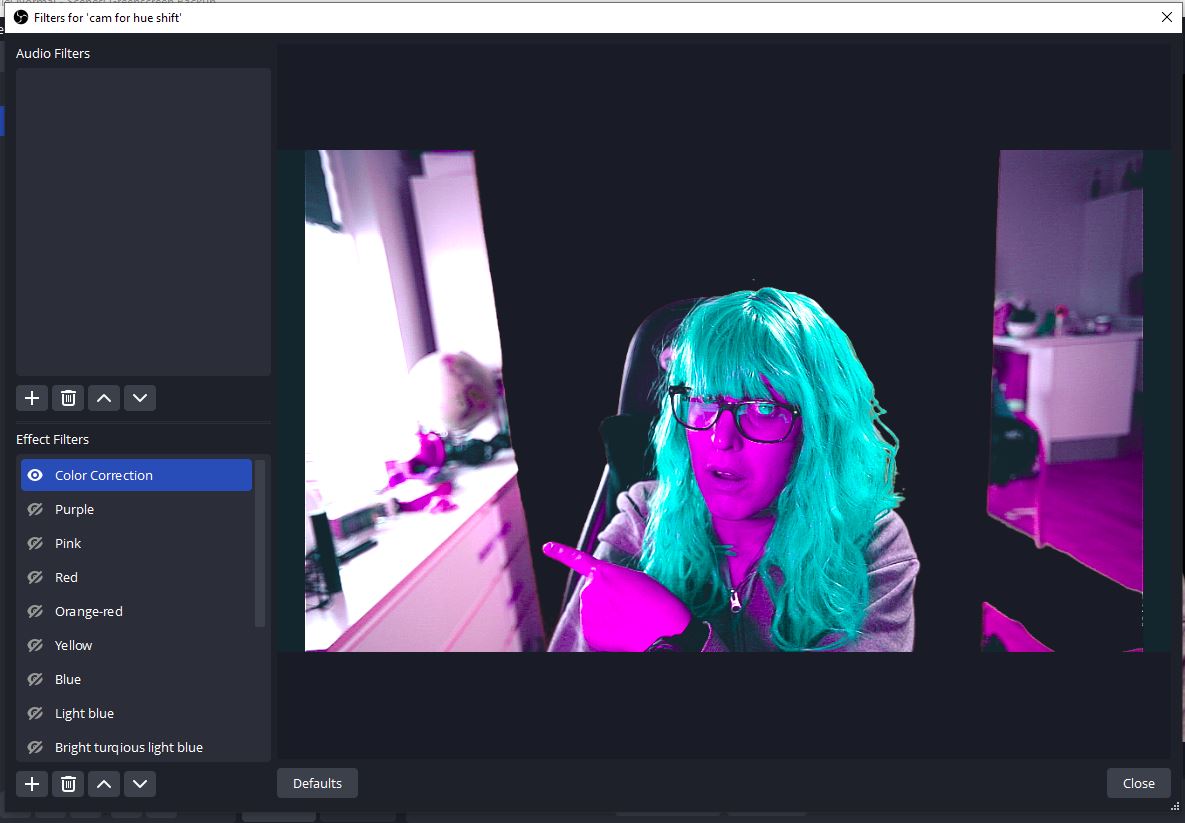
As soon as a filter gets toggled (click on the eye to make the filter visible), the transition to the new settings will happen in the top filter (Color Correction) and then the "Move Value" filter wil toggle itself off again automatically.
- To add the functionality to the Streamdeck, drag a "Toggle OBS filter" effect on a button in your Streamdeck software and choose the "Move Value" filter. In my case, I had a button for each single "Move Value" filter: Purple, Pink, Red, Orange-red, ....
And this is how it looked when I just randomly smashed all the buttons:
Did you like this?
Was this post useful to you? Follow me on Twitch or support me on Ko-Fi.
Read more: